30 December 2009

Delicious (and Easy) Bean Burgers

We have a restaurant in Columbus, Northstar Cafe, that makes the most amazing vegetarian burgers. The burgers are meaty without having meat, full of rich smoky undertones and delicious umami flavor. I have absolutely no idea how Northstar manages to create such an amazing vegetarian alternative to a hamburger. I still haven't figured out how to recreate it at home, but I do like to play around with other vegetarian burgers. Most recently, I noticed a recipe that Joe posted on his blog, Culinary in the Country, for Bean Burgers with Spicy Guacamole. I was intrigued by the addition of cornmeal to the bean mixture. I wondered if this could be part of the solution to the Northstar Cafe recipe mystery. Alas, I don't think it is the missing ingredient, but these burgers were delicious nonetheless.


The patties were very easy to throw together. I didn't have any avocados so there was no spicy guacamole on my burgers. I do think that the guacamole would be a perfect accompaniment to these bean patties. My burgers were spicy because I cooked my pinto beans with lots of dried jalapenos, coriander and dried onion.


I ate it on a toasted English muffin with pepper-jack cheese and salsa. My burger did fall apart once I bit into the bun, but it still tasted great. I served the burgers with a lime juice based slaw, similar to the recipe I posted here. The recipe was very easy to cut in half, and I was able to make a few simple adjustments based on what I had on hand. I will definitely make these burgers again.


Bean Burgers
adapted from Culinary in the Country

1/4 cup cooked brown rice
2 tablespoons extra-virgin olive oil, divided
1/4 cup chopped onion
1 garlic clove, minced
1 1/4 cups cooked pinto beans, drained
1/2 teaspoon smoked paprika
1/4 teaspoon toasted cumin seeds, ground
3 tablespoons chopped fresh cilantro
1/4 cup cornmeal, divided (I used blue cornmeal!)
salt and fresh ground black pepper
2 burger buns

To prepare the burgers

In a medium non-stick skillet, heat 1 tablespoon oil over medium heat. Stir in onion and garlic - cook until until soft and fragrant, about 3 minutes. Stir in beans, paprika and cumin - cook for 1 minute, stirring. Using a potato masher or fork, mash the beans to a coarse paste.

Scoop the mixture out into a bowl and let cool slightly. Stir in cooked brown rice, cilantro and 1 1/2 tablespoons cornmeal - season with salt and fresh ground black pepper.

Evenly divide the mixture into 2 portions, forming each into a patty. Coat both sides of the patties with the remaining cornmeal, then place each onto a plate. Place into the refrigerator and chill for 20 minutes.

In a large non-stick skillet, heat 1 tablespoon oil over medium heat. Add burgers to skillet and cook about 3-4 minutes per side, until lightly browned. Serve with pepper-jack cheese and salsa.

Makes 2 servings.

28 December 2009

Belated Christmas Wishes!

Merry Christmas and Happy New Year!


I know I am arriving late to the party, but I really want to post these pictures before the magic of Christmas is gone :) (I will post recipes soon, I promise!) The past 3 weeks have been a whirlwind for me. I have spent a ton of time in the kitchen with my Mom baking (and my Dad lurking around to sample) and a ton of time with my entire family. I got to see my Aunt and Uncle from New York, my Great Aunt from West Virginia and her family, all of my siblings and their families, and lots of time with my parents. Of course, in the midst of it all I caught a horrible cold but it is much better than the flu that took me out for over 2 weeks last Christmas. I have had many ups and downs over the past year, but I am comforted and reassured knowing that I have so many people who love me and worry about me. I hope your holidays were filled with just as much chaos, love, joy and food as mine were!

Almond Chocolate Toffee Motzoh


Cashew Chocolate Toffee Motzoh


Santa bringing the window-pane candy


Window-Pane Candy


Window-Pane Candy cooling (with pizelles)


Cashew Brittle with Fleur de Sel


Mom breaking up window-pane candy


Window-Pane Candy
(I couldn't decide which picture I liked best!)

27 December 2009

I have a Reputation.

Apparently my love of food is so obvious that people who know me for entirely non-food-related-reasons still know me as a food lover. Most recently, a friend, who I know only through the internet for fantasy football reasons, offered to share a family recipe with me. He said that I would be amazed at how a simple marinade could transform a cut of meat.


It just so happened that in the next week or so after this conversation, I noticed bison flank steak on sale at Whole Foods. I happen to love bison, and flank steak is a wonderfully healthful, flavorful cut, so I decided to try it out. As luck would have it, the recent marinade conversation popped into my head, and I whipped it up in no time with mostly pantry ingredients.


I let my steak marinate in the delicious salty-sweet mixture for about 18 hours. The bison was delightfully tender and kissed with flavor throughout each bite. I cooked my steak to medium-rare (I probably should have cooked it even a tiny bit rarer).

Can you identify this green?
No idea what it is called, but it tastes delicious!


As the steak rested, I sauteed up a big pile of mushrooms, green onions and some type of tasty green from the farmers' market. I sliced the steak against the grain and piled it atop the mushroom-greens saute. It was the perfect healthy, quick meal.


I am sending this post along to Lynda of Lynda's Recipe Box who is hosting December's Family Recipes Event since it is a family recipe that was passed on to me by a friend. This event has been hosted by The Spiced Life and The Life and Loves of Grumpy's Honeybunch in the past. I highly recommend checking out Lynda's site so you can catch the round up of recipes at the end of the month. I am sure there will be lots of holiday recipes to tempt you (and me!).

I hope you had a Merry Christmas and whatever else you celebrate!


Paul's Aunt's Steak Marinade

1 green onion, chopped
1/4 cup soy sauce
1 1/2 teaspoon powdered sugar
1 teaspoon garlic powder
2 teaspoons honey
2 tablespoons vinegar (I used cider)
3 tablespoons oil (vegetable or olive)
Mix all ingredients in a large resealable bag; add flank steak and marinate for several hours.

28 November 2009

Overcoming My Fear of Indian Food

What do you fear most in the kitchen? Is there a particular cuisine or method of cooking that you really would like to try, but you fear to make on your own? Is it extra sad because you love to eat that particular food?


My fear: Indian food. I feel so silly admitting it, especially since my sister cooks it all the freaking time. I am sure part of my fear is due to my inexperience with enjoying Indian food. It is a giant country, and I have only recently discovered a love for certain types of Indian cuisine. Specifically, there is a lovely vegetarian Indian restaurant that I found with a friend in the past couple of years that has opened a world of possibilities to me.


I have been to several Indian restaurants, and none of them have ever moved me. None of them were vegetarian. I wonder if that is only a coincidence or the reason why I love the Banana Leaf restaurant here in Columbus. I know for sure that Banana Leaf is an excellent restaurant - I have had several experienced lovers of Indian food assure me that it is outstanding food. Honestly it was a relief to hear it was as good as I thought since I've had nothing comparable before.


It is safe to say that this restaurant has made me far more open-minded about trying Indian food. My sister made me an incredible feast inspired by a trip to Banana Leaf earlier this summer. It was delicious, and I felt somewhat confident afterward that I would be able to re-create our meal. But it wasn't until I saw a recent post by Kathy B on the CLBB about using stew meat that I was truly inspired to cook an Indian meal at home. Yes, I see the irony in me waxing poetic about eating vegetarian Indian food and then segueing into cooking an Indian pot roast.

Browning the meat thoroughly is very important to the finished flavor.

This dish is perfect for a cool autumn day. It was very easy to throw together with mostly pantry ingredients (I only had to restock my yogurt supply and buy stew meat). The beef falls apart and melts in your mouth. The Indian flavors are mild, and the yogurt combines with the beef juices to make a rich sauce. I loved eating this with a bit of naan and mango chutney. I also made the cauliflower and peas dish that my sister taught me how to make earlier this summer. It was the perfect accompaniment to the beef.

Fresh from the oven before stirring.

Check out Laura's blog for the Sauteed Cauliflower and Peas.


Beef Baked with Yoghurt and Black Pepper

Source: Madhur Jaffrey's Indian Cooking

6 Tbsp. vegetable oil
2 lbs. boneless stewing beef cut into 1-1/2 in. cubes
3 med. onions, peeled and minced
6 cloves garlic, peeled and minced
1/2 tsp. dried powdered ginger
1/8-1/2 tsp. cayenne pepper
1 Tbsp. paprika
2 tsps. salt
1/2 tsp. black pepper
1-1/4 c. plain yoghurt, beaten lightly

Preheat oven to 350 degrees. (I cooked mine at more like 275 degrees for 3+ hours)

Heat the oil in a wide, flameproof casserole-type pot over a med-high flame. When hot, put in as many meat pieces as the pot will hold easily in a single layer. Brown all the meat this way, then remove.

Put onions and garlic into the same pot and turn the heat down to medium. Stir and fry the onion-garlic mixture for about 10 minutes or until it has browned. Now put in the browned meat as well as any juices that might have accumulated in the plate. Also put in the ginger, cayenne, paprika, salt, and pepper. Stir for a minute. Now put in the yoghurt and bring to a simmer. Cover tightly, first with aluminum foill and then with a lid, and bake in the oven 1-1/2 hours. The meat should be tender by now. If it is not tender, pour in 1/2 c. boiling water, cover tightly, and bake another 20-30 minutes or until meat is tender. Stir meat gently before serving.
Serve with chapatis or another bread, or with a moist rice pullao.


Serves 4-6

18 November 2009

Can you handle more canning?

In my canning bonanza, I became obsessed with canning cookbooks as I have mentioned. I still want more- as a cookbook collector, there is always room for another cookbook or two- but I think I have found my bible. Seriously. I would recommend this book to anyone who is interested in canning, whether a novice or expert. The Ball Complete Book of Home Preserving by Judi Kingry and Lauren Devine is just that- the complete book for everything home preserving (slightly redundant, but it is so true!). I think many people suggest the Ball Blue Book as the sort of entry level resource for canning. And I cannot disagree, it was the first canning book I owned and it has taught me the basics. But for more or less the price of one hard-cover cookbook, you could own both the Ball Blue Book and the Ball Complete Book of Home Preserving. I think these two cookbooks would be one of the best investments you could ever make if you were really interested in canning.

(No, I am not employed by Ball. I just feel really strongly about their product. It is of the highest quality and explains both the science behind canning as well as the artistry. I feel comfortable with the knowledge I have gleaned from these books- as well as my Mom- that I won't make anyone sick with canning, which is a pretty reasonable fear for first-time-canners. The reason Ball is still around after a zillion years is that they do canning best! Check out their website for additional information on canning. I am sure you will become addicted to canning and home preserving like me.)

Okay, now that my sales pitch on canning is over, I must tell you about these pickles I made. They are vinegary and a touch spicy, very simple and perfect on top of a salad. I haven't made it beyond the salad because I like it so much. I am sure these would be lovely on a cheese platter as a sour component. I adore the cauliflower in this recipe. It is the highlight of the pickles, so of course I adjusted the amount of cauliflower to suit my tastes.

Spicy Pickle Mix
adapted from the Ball Complete Book of Home Preserving

Makes about 6 pint jars

8 cups cauliflower florets
2 cups poblano peppers, seeded and cut into strips
1 cup sliced, peeled carrots
2/3 cup pickling or canning salt
8 1/2 cups water, divided
3 1/2 cups sliced hot pepper rings (I used serrano peppers)
1 clove garlic
8 1/2 cups white vinegar
3/4 cup granulated sugar
2 tbsp prepared horseradish

1. In a large glass or stainless steel bowl, combine the cauliflower, poblano peppers and carrots.
2. In another large glass or stainless steel bowl, dissolve pickling salt in 7 cups of the water. Pour over vegetables. Cover and let stand at room temperature for 1 hour.
3. Meanwhile, prepare canner, jars and lids.
4. In a colander placed over a sink, drain vegetables. Rinse with cool running water and drain thoroughly. Add hot pepper rings and mix well.
5. In a large stainless steel saucepan, combine garlic, remaining 1 1/2 cups water, vinegar, sugar and horseradish. Bring to a boil over medium-high heat, stirring to dissolve sugar. Reduce heat and boil gently for 15 minutes, until liquid is infused with garlic flavor. Discard garlic clove.
6. Pack vegetables into hot jars to within a generous 1/2 inch of top of jar. Ladle hot pickling liquid into jar to cover vegetables, leaving 1/2 inch headspace. Remove air bubbles and adjust headspace, if necessary, by adding hot pickling liquid. Wipe rim. Center lid on jar. Screw band down until resistance is met, then increase to fingertip-tight.
7. Place jars in canner, ensuring they are completely covered with water. Bring to a boil and process for 10 minutes. Remove canner lid. Wait for 5 minutes, then remove jars, cool and store.

10 November 2009

Look at what I found!

I made a couple new acquaintances this weekend at a fundraiser for the Available Light Theatre. The fundraiser was an opportunity to shop to support the theatre group from some locally owned businesses, and I fell completely in love with the two crafty-chicks selling the most adorable stuff. Unfortunately I didn't bring enough cash with me to buy as much as I wanted... but fortunately the two crafty-chicks sell their stuff online and at local stores- woohoo!

Firstly, I think someone who loves to cook would love to check out this website, Made by AmyD. Amy is not only super friendly and charming but she also makes the most adorable aprons of all time - and she can make stuff to order if you are unusually shaped (or uniquely shaped as I like to think of myself...). I especially am in love with her aprons with the state of Ohio embroidered on the front. I think I am homesick in advance of moving, so everything Ohio is making me happy (or at least helping to calm my anxieties).

Also selling some very cute, kitschy Ohio stuff (like the sweetest journal made with an Ohio map as the cover! I am going to miss Ohio!) was Olivia from Wholly Craft. Who knew we had so many cool, locally owned stores selling handmade stuff in Columbus?! I need to pay more attention. Wholly Craft is a brick and mortar store on High Street, but be sure to check out their website for lots of information on classes and upcoming events at their store.


Anyway, I was just really impressed by how friendly these two ladies were - and the fact that I can head down to High Street in Columbus and buy lots of locally made gifts for Christmas! Yay for supporting local businesses!

Check out AmyD locally at the Kickstart at 913 North High St., Columbus, Ohio and visit Wholly Craft at 3169 North High St., Columbus, Ohio. (Make sure you visit their websites for hours cuz they can be a little funky.)


02 November 2009

The Best Pumpkin Bread (According to Dad)

Every year my father, (usually) brother and several friends head up to Northern Wisconsin to hunt. They have been doing this for over 10 years since they started when I was in college at University of Wisconsin (Go Badgers!). Through coincidence, poor planning or fatherly neglect, this trip has always been planned to coincide with my birthday. In fact, I cannot remember a time when my whole family was around for my birthday as a child. I assure you that I have not been permanently scarred by this neglect. Sometimes I think my sister has since she is always very affronted on my behalf. It is something I am just used to, and it really doesn't bug me too much.


It actually all ended up working out while I was away at college. I was over 8 hours away from home, and I was more homesick than you could ever understand. I never expected to be as homesick as I was, and lord knows I didn't tell anyone. I was embarrassed by my own inability to cope with missing my family. I would have continued to hide it from them if I could have, but my older brother happened to call me one October night and tell me that he missed me. He was watching some movie with "a bratty little sister" and he missed me. That was the end of my bravado. I think I burst into tears and managed to sob out to Chris how much I missed home. Now that I think about it, Chris is usually the sibling I want most when I am crying or upset. He can always calm me down - maybe I was just waiting to confess my fears and anxieties to him.


Anyway, back to the annual hunting trip. All of those missed childhood birthdays? They were totally made up for when I got to see my Dad and his friend, Dr. H, on my birthday. They would purposefully drive through Madison on their way to Northern Wisconsin to take me to dinner for my birthday. They usually managed to see me on my actual birthday, which was a great gift. Seeing my Dad for my birthday, talking to Chris, reading the letters that my Mom faithfully wrote got me through that homesickness. So when I think of their annual hunting trip, I automatically think of being away at school.

Now that I am back in Ohio, I like to send some food along with them for their week in the woods. My Mom always bakes bread, makes soup and chicken stock. She also bakes chocolate chip cookies that Chris loves. I have taken to making quick breads. I can pop them in the freezer so they are easy to transport, and they make a quick, delicious snack for the guys after being out in the cold hunting. This particular loaf is incredibly moist and flavorful. The tart bite of chopped, fresh cranberries is a pleasant counterpoint to the sweet pumpkin. My Dad's favorite part? The sugary topping with a delightful cinnamon bite. Make this bread and share it with someone you love - it is worth it.


Original recipe from The Gourmet Cookbook, but adapted from the Amateur Gourmet blog.

Pumpkin Apple Bread (with Cranberries)
makes 2 loaves, most of my adjustments came in the spice section - I increased them significantly
For topping:
1 Tbs all-purpose flour
5 Tbs sugar
1 tsp ground cinnamon
1 Tbs unsalted butter, softened

For bread:
3 cups all-purpose flour
3/4 tsp salt
2 tsps baking soda
3 tsps ground cinnamon
1 tsp freshly grated nutmeg
1 tsp ground cloves
1 tsp ground allspice
1 tsp ground ginger
1 (15-oz) can solid-pack pumpkin
3/4 cup vegetable oil
2 1/4 cups sugar
4 large eggs, lightly beaten
2 Granny smith apples, peeled, cored, and chopped (2 cups) (I have substituted both 1 cup chopped apple, 1 cup chopped cranberries and 2 cups chopped cranberries for the 2 cups of apples)

MAKE THE TOPPING: Blend together flour, sugar, cinnamon, and butter in a small bowl with your fingertips until mixture resembles coarse meal.

MAKE THE BREAD: Put a rack in the middle of oven and preheat oven to 350F. Butter two 9 X 5 inch loaf pans. Sift together flour, salt, baking soda, cinnamon, nutmeg, cloves and allspice into a medium bowl.Whisk together pumpkin, oil, sugar, and eggs in a large bowl. Add flour mixture, stirring until well combined. Fold in apples. Divide batter between buttered loaf pans. Sprinkle half of topping evenly over each loaf.
Bake until a wooden pick or skewer inserted in center of bread comes out clean, 50 to 60 minutes. Cool loves in pans on a rack for 45 minutes, then turn out onto rack and cool completely, about 1 hour.

24 October 2009

In the Kitchen with Mom (and Pickles)

I have previously mentioned my new-ish love of canning. My whole life, I have appreciated canning because I was fortunate enough to grow up with a mom and grandmother who canned all sorts of concoctions. Homemade grape jelly was only a cupboard away in my childhood. Playing dress-up at my Gramma's house while she and my Mom made quarts upon quarts of applesauce was a regular summer activity. Not to mention the adventure out to the family farm to visit the cows, chase the barn cats and pick the old apple tree clean. Those days were truly some of the best of my childhood. We had jams, chutneys, pickles, jellies, sauces, tomatoes, salsas, just about anything that could be put-up was put-up. I have become so enamored with the old-fashioned notion of putting-food-by that this was my summer of mastering canning. I have an ever-expanding library of cookbooks dedicated to canning and preserving the harvest. My Christmas wish-list is full of pressure canners and other canning cookbooks and cute jars. It is possible, during those long-ago summers, that my Gramma and Mom were creating a little canning monster. It only took 20 or so years for the monster to appear.

This process will be so much easier after my
Mom gets her kitchen remodeled!


I like to think those around me are lucky that monster has appeared. My friends and family have certainly reaped the benefits of my summer past time. But really it has been most beneficial for me. This past summer has been filled with more ups and downs that I know how to put into words. During some of the harder times, canning has cheered me up. I am sure that makes no sense to someone who hasn't fallen in love with canning. When I put a hard day's work into the kitchen, and I come away with jars of food that a loved one can treasure in the coming months, I am fulfilled. I am momentarily distracted from the chaos in my life, and honestly I am just totally proud of myself. Canned goods are a very physical, literal display of my efforts and achievements in the kitchen. Better yet, they are a very physical, literal display of my bond with my Mom.

Thanks to my Mom for modeling the careful
placement of the jars in the canner!
Note the gloves due to the hot peppers.


I would never be as confident with a canner if I hadn't learned from her. I am sure my Mom will laugh when she reads this because she only showed me how to can once (under some serious pressure because her hip had been replaced and she couldn't physically help - only instruct). But that day in the kitchen, and more importantly my entire childhood, taught me what I needed to know. Canning is a scientific process, but it doesn't have to be scary or intimidating. She has given me the confidence in myself to be successful at something that has brought me a tremendous amount of joy. That is a priceless gift.

Mom posing with the canner! I love this picture for a variety of reasons.
The mask cracks me up and the look in my Mom's eyes is just so her.


So a few weeks ago, my Mom and I decided to can pickles together. It was a very, very long day. But it was also a ton of fun! We actually did all of the work together, and I couldn't have asked for a better day with her. Sadly for my Mom, what we pickled she will never eat - a variety of hot peppers that are too spicy for her. But she was a trooper and insisted we keep going even when I was ready to toss out the rest of the pickles because I couldn't face another round of wiping down jars and waiting for water to boil. We were in the kitchen for about 12 hours with only a quick lunch break. We were exhausted but came away with dozens and dozens of jars of Mixed Pickled Peppers (just plain in a vinegar solution) and Spicy Bread and Butter Pickles.

Onions - sliced and ready to be pickled.


If you are unfamiliar with Bread and Butter Pickles, I think they are some of the most delicious homemade pickles on the planet. They are incredibly sweet with a nice oniony flavor accented with mustard seeds. On their own, they are too sweet for me, but on top of a hamburger or tuna sandwich, they are pure heaven.

A pile of peppers preparing to be pickled.


Traditionally, my family makes them with a mixture of cucumbers, bell peppers and onions. I, of course needing to fool with tradition, told my Mom that we needed to substitute hot peppers in for the cucumbers. Not to pat my back or anything, but I am brilliant. The spicy flavor of hot peppers mixed with the sweet vinegary sauce is perfect. To make your own Spicy Bread and Butter Pickles, just follow my lead and substitute hot peppers in for the cucumbers or zucchini in your favorite recipe.

The original Bread and Butter Pickle Recipe -
in my Mom's words and handwriting!


I am submitting this post to Laura of The Spiced Life for October's Family Recipes Blog Event. Laura and Shelby host the event monthly. Be sure to check out Laura's blog for the round up!

21 October 2009

Pumpkin Blueberry Poundcake with Cranberries!

I have been planning my moving strategy for awhile now. I enjoy doing stuff like planning and strategizing. It helps me to avoid the actual doing of things. Procrastinate? Me? Never. One of my big dilemmas after packing my cookbooks (dare I share with the world that I have over 16 large, paper boxes worth of cookbooks?!?!) is my cooking magazines. What would you do if you had bookshelves of foodie magazines collected over the past 7-10 years? Stare at them bleakly trying to come up with a plan? Admit to yourself that you haven't actually thumbed through any of the back issues you've collected? Cough and gasp when you breathe in the frightening layer of dust you disrupt when you pull a few of the magazines out? Realize that if your sister were moving and packing, you would tell her to get rid of them!


I think that was the final straw - realizing that if it was someone else's junk, you'd encourage them to let the magazines go. So for the past week, instead of simply strategizing, I have actually been 
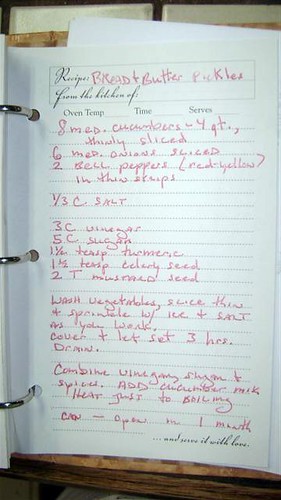
doing something. I have been flipping through all my accumulated food magazines and clipping any recipes or articles that look interesting to me. I am reminding myself to only keep stuff that I think I will actually use or reference later. Fortunately, I already had a little recipe scrapbook started from when my mom got rid of all of her Bon Appetit magazines from the early 1980's. I decided to just keep cutting and pasting recipes into my little food journal. I am passing the magazines on to anyone who wants them - food magazines never really expire, so someone else can read them now. I feel like I have actually accomplished something. My bookshelf is completely empty now - free from the dozens of magazines that were weighing heavily on my mind!


And the best part? I rediscovered tons of recipes I want to make as soon as possible! It is so much fun being reminded of dishes I wanted to try but never got around to making. I have especially enjoyed running into the autumn issues. The food perfectly fits the weather we have had around here lately. I have made so many loaves of pumpkin bread, I am surprised I haven't turned into a pumpkin! Fortunately my dad and his hunting buddies like the pumpkin bread so I am freezing much of it to go with them on their next big trip.


This recipe comes from Cooking Light, which is unusual for me, as I often feel like I find nothing I want to bake in that magazine. Apparently I need to change my tune and get over my idiotic bias. This "poundcake" is exactly like a quick bread. In fact I baked it in two loaf pans instead of the tube pan as instructed in the recipe. My dad said this was his second favorite of my pumpkin bread experiments, so I will be sure to share his favorite soon. The loaves come out with a very dense, moist crumb. It wasn't too sweet, but I think it could be if you don't follow my one significant change to the recipe - instead of 2 cups of blueberries, I added 1 cup of blueberries and 1 cup of chopped, fresh cranberries. The tart tang of the cranberries really make this bread special.

Blueberry Pumpkin Pound Cake
from Cooking Light

This cake was adapted from Debra Ayers's original recipe, which earned a blue ribbon at the Machias Blueberry Festival in 1999. Frozen blueberries tint the batter purple.

Cake
Cooking spray
3 cups plus 2 teaspoons all-purpose flour
4 teaspoons baking powder
1 1/2 teaspoons ground cinnamon
1/2 teaspoon ground nutmeg
1/4 teaspoon salt
1/4 teaspoon baking soda
1/4 teaspoon ground cloves
3/4 cup butter, softened
1 cup granulated sugar
3/4 cup packed brown sugar
1 teaspoon vanilla extract
3 large eggs
1 1/3 cups canned pumpkin
1/3 cup fat free sour cream (I used fat free Greek yogurt)
1/2 cup 1% low fat milk
2 cups fresh or frozen wild blueberries (I used 1 cup each of blueberries and chopped, fresh cranberries)

Glaze (I skipped the glaze since I was going for more of a quick bread)
1 cup sifted powdered sugar
1 tablespoon canned pumpkin
2 1/4 teaspoons 1% low fat milk
1/4 teaspoon vanilla extract

1. Preheat oven to 325 deg.
2. To prepare cake, coat a 10-inch tube pan with cooking spray, dust with 2 teaspoons flour. Set aside. (I used 2 loaf pans instead of the tube pan)
3. Lightly spoon 3 cups flour into dry measuring cups, and level with a knife. Combine 3 cups flour and next 6 ingredients (through cloves), stirring with a whisk. Place butter in a large bowl, beat with a mixer at medium speed 1 minutes or until fluffy. Gradually add granulated and brown sugars and 1 teaspoon vanilla, beating until light and fluffy (about 3 minutes). Add eggs, 1 at a time, beating well after each addition. Add pumpkin and sour cream, and beat well. Beating at low speed, add flour mixture and milk alternately to butter mixture, beginning and ending with flour mixture. Fold in blueberries. (I did all the mixing by hand without any problems)
4. Pour batter into prepared pan. Bake at 325 deg for 1 hour and 15 minutes or until a wooden pick inserted in center comes out clean. Cool in pan 15 minutes on a wire rack. Place a wire rack upside down on top of cake, invert onto rack. Cool completely.
5. To prepare glaze, combine powdered sugar and remaining ingredients, stirring until well blended, drizzle over the cooled cake. Yield 16 servings (serving size, 1 slice).

25 September 2009

More Birthday Wishes! With a Side of Pork Chop


Happy Birthday to my boyfriend, Jason! Love you!!


Onto the main event: Pork Chops with Braised Cabbage and Apples in a Hot Pepper Apple Jelly and Oven Roasted Mushrooms and Brussels Sprouts. Is that a mouthful or what? This dish was divine! It was the perfect meal for a cool autumn day - and I know it is a meal that my boyfriend would have loved to eat with me. I must remember this meal and share it with him!


I had a craving for pork chops recently, and I wanted to sample some hot pepper jelly my mom canned earlier this summer. To me, pairing pork with a spicy, tart, sweet jelly seemed like a no-brainer. My mom tried a new recipe which incorporated apples with the hot peppers, sugar and vinegar to make a thick jam with flecks of red pepper. It was quite good, especially with the pork. I first pan seared the pork chops while I roasted the brussels sprouts and mushrooms in the oven. Then I removed the chops and added some sliced red onions, apples and cabbage into the pan. Then I added a bit of water, a splash of cider vinegar and a dollop of pepper jelly. Once the jelly melted into the vegetables, I added the pork chops back into the pan, covered and cooked the chops until done.


The cabbage and apples kept a little bit of crunch from not cooking too long, and the pork chop was moist and tasty in the sauce. I loved the roasted vegetables alongside the pork, but I think mashed potatoes would make an equally lovely accompaniament. If you wanted to make the sauce a little more decadent, you could stir in a couple pats of butter after taking it off the heat at the very end. It would create a richer sauce, but I thought it was very nice on its own.


Since this isn't an actual recipe - just follow your gut instinct. But here is an approximation of what I did:
Serves 2

2 Pork Chops (I used boneless here)
1/2 head of savoy cabbage, shredded
1/2 medium onion, thinly sliced
1 large apple, thinly sliced
1.5 T hot pepper jelly
~ 1/4 cup water
~ 2 T cider vinegar
~ 1 T olive oil
salt and pepper, to taste


-Liberally salt both sides of pork chops (I used over 1/4 cup of salt total - use plenty cuz you will rinse most of it off) and allow to rest on the counter for about 20-30 minutes before cooking
-Preheat a skillet over medium-high heat, add oil when you are ready to cook the chop
-Rinse and dry the pork chops and sprinkle with freshly ground black pepper
-Sear both sides of the pork chops for about 2 minutes/side and remove chops from pan
-Reduce the heat to medium and add the onions; cook for 3-4 minutes
-Add the apples and cabbage; cook for 3-4 minutes, then add the water and vinegar
-Scrape the bottom of the pan to get all the carmelized bits up and add the pepper jelly, stir to combine
-When the jelly has melted into the sauce, return the chops to the pan, cover and cook over medium heat until chops are done to your preference

24 September 2009

Perfect Summer Lunch with Tzatziki

First of all - Happy Birthday to my sister, Laura, today!!


Phew. I am still trying to get caught up from my weekend in Chicago. In case you missed it, Laura posted many more details and pictures on her blog about our adventure. It truly was a wonderful, whirlwind trip, and I am really happy I got to do with my big sister. It was like our last big adventure before I move away (and really, we haven't had any super-cool-adventures since she had kids, so that was extra fun too!). Anyway, go check out her blog if you are interested in more U2 pictures or her ode to Rick Bayless - who 110% totally deserves his reputation as a Mexican Food God. O I wish I could live closer to his restaurants... so freakin' tasty.

But life goes back to normal in Ohio... well kind of normal...I was back and forth to my little brother's house last week for my niece's birthday party and other visits. My sister in law made awesome food again - especially, as usual, the delicious Kielbasa and Sauerkraut and a really tasty Jello creation with cranberries that I am going to have to get the recipe for! Also, my roommate is moving out since I am getting ready to move to Massachusetts to be with my boyfriend. Which in turn means I need to get my butt in gear and start packing. I have no official moving date, but there is a tentative closing date on his house which is my current guiding light - October 30th. Understandably, my blogging and cooking are sporadic at best with my inability to concentrate on anything.

But in true procrastination mode, onto food! Greek food in fact. Greek food always seems really complicated to me - I rarely feel like attempting to make it at home. Which is pretty strange considering much of it is simple and easy to throw together. I think this must be one of my mental blocks, of which I seem to have many! :) I think Greek food does dips better than any other cuisine other than maybe Mexican. Anything you put in a food processor and can schmear on pita or vegetables, makes me so happy. I was flipping channels (more procrastination!) and noticed a tv chef making tzatziki, I decided I should try it at home - how hard could it be? I am thrilled I took the plunge.


I had a large container of my favorite Greek yogurt in the refrigerator- Fage 0%- and I decided to drain some of the yogurt overnight. I have always heard that yogurt gets even better with draining, and I must admit it was shocking how much thicker and creamier a no-fat yogurt can become. It was like thicker whipped cream cheese, or a really dense ricotta. I could have eaten it with a little salt on crackers on its own. But I went ahead and consulted a Martha Stewart book and adapted her Tzatziki recipe to suit my tastes. The cucumber and dill are such a lovely combination. You should try it too - so yummy on any vegetable or bread, and I discovered I love it on hard-boiled egg whites! (I give my dogs my hard-boiled egg yolks since I don't care for them, but it would probably be tasty on the whole egg.)


Tzatziki
adapted from The Martha Stewart Living Cookbook, The Original Classics
(my changes are in red)

Makes 1 Quart

This Middle Eastern condiment is often paired with spicy foods; yogurt tames the heat of chiles and spices.

3 medium cucumbers, peeled, seeded, and cut into 1/2 inch chunks (I coarsely shredded on a box grater and used large pickling cukes - so no need to seed or completely peel)
2 t kosher salt
2 c plain yogurt (I used Fage 0% and drained it overnight in a paper-towel lined colander set over a bowl in the refrigerator)
2 t minced garlic (I used one small clove) 2 T minced fresh dill
1 T minced fresh mint (I ommitted and subbed in 1 T fresh basil)
1 T extra-virgin olive oil (I accidentally omitted, but the drained yogurt didn't need it)
1 T fresh lemon juice

In a colander, toss cucumbers and 1 teaspoon salt. Place colander in sink; let drain 20-30 minutes. Press cucumbers to extract the excess liquid. Transfer to a bowl; mix in yogurt, garlic, dill, mint, oil, lemon juice, and remaining salt. Chill about 1 hour for the flavors to blend; serve at room temperature. (I added freshly ground pepper and added the salt to taste)

15 September 2009

Where Have I Been Lately?

In the Windy City watching U2.

Twice.

Once in the front row.


Bono was about 3 feet from me.

Adam grinned at us.

Forgive me for not cooking for a few days... I am all atwitter (and very, very tired).

09 September 2009

Scallops + Orange + Basil = Tummy Love

Wow. That one word sums up this dish. I truly felt like I was dining in a ritzy French restaurant for lunch when I took the first bite of these Pan Fried Scallops with Orange-Basil Sauce.


I first discovered this recipe while having an "email discussion" with my sister about cookbooks. For some reason I was thumbing through my copy of Terrific Pacific Cookbook by Anya Von Bremzen and John Welchman, and I noticed this scallop recipe. Since my sister has turned into a scallop fiend (who could have ever predicted that would happen?!) I pointed the recipe out to her. But the more I stared at the recipe, the more I knew I would be making this recipe as soon as possible.


As soon as possible was a little challenging simply because the recipe calls for a rather unique ingredient: whole green peppercorns in brine. While I have certainly heard of this ingredient, I had never seen it or tasted it. I was on a mission to find the peppercorns. On my fourth or fifth stop, I finally found the peppercorns! I have to give a shout-out to The Hills Market in Worthington, Ohio for stocking unusual ingredients and having outstanding customer service! I highly recommend calling ahead instead of driving around like a chicken with its head cut off like I did. I think this dish would be tasty without the peppercorns, but it was also fun to try a completely new flavor.


The orange and basil are the perfect flavors to accent the mild, sweet flavor of scallops. The peppercorns are a bright, spicy contrast against the sweet orange. When you bite into a peppercorn, you get an explosion of spicy peppercorn flavor. It also has a slightly medicinal or chemical flavor that seemed to put off my roommate. I don't think I would sit and snack on them, but they were a lovely counterpoint in this dish.


Pan Fried Scallops with Orange-Basil Sauce
from Terrific Pacific Cookbook

In Singapore we indulged in all manner of street food, had fun eating with our fingers at "banana leaf" Indian curry dives, and feated like emperors at lavish Chinese banquets. But our final lunch in this city was French, at a great bistro called the Marco Polo. These scallops, accented with the tang of citrus and perfumed with basil, were one of the dishes we sampled there, and its fresh, bright flavors seemed right at home on this exotic island.

Ingredients
1/2 cup fish stock, bottle clam juice, or water (I used clam juice) 1/3 cup dry vermouth, preferably Noilly Prat (I sought out the Noilly Prat and it is wonderful!)
3 tablespoons dry white wine
2 tablespoons fresh orange juice
8 tablespoons (1 stick) unsalted butter, chilled (I used more like 4 tablespoons cuz I didn't mind a less buttery sauce)
1 1/4 pounds sea scallops, halved lengthwise if large
1 tablespoon whole green peppercorns in brine, drained
1 1/2 tablespoons fresh lemon juice
1 small, seedless orange, peel and all the white pith removed, cut into medium dice
3 tablespoons shredded fresh basil leaves
salt and freshly ground black pepper, to taste

1. In a medium-size nonreactive saucepan, combine the fish stock, vermouth, wine and orange juice and reduce over medium heat to 1/4 cup, about 15 minutes.

2. Meanwhile, melt 2 1/2 tablespoons of the butter in a large skillet over medium heat. Add the scallops and cook until opaque throughout, about 2 minutes per side. Remove from the heat and keep warm while preparing the sauce. (I used more like 1 tablespoon of butter here)

3. Cut the remaining 5 1/2 tablespoons of butter into small pieces. Remove the stock mixture from the heat and quickly whisk in the butter, 1 piece at a time, working on and off low heat, to keep the sauce at an even, butter-melting temperature. Whisk constantly until all the butter is emulsified. Stir in the peppercorns, lemon juice, orange and basil and season with salt and pepper to taste. (I used more like 3 tablespoons of butter in this step)

4. To serve, divide the sauce among 4 plates and top with the scallops.

Serves 4