28 June 2009

More Jam! Strawberry Lemonade Anyone?

This is another jam I recently whipped up after spending an hour in the strawberry farm picking the tiniest, sweetest strawberries. The inspiration behind this concoction is strawberry lemonade. I love the sweet-tart combination that those two flavors create. I figured the two flavors in a jam would be very tasty and create the same flavor explosion in your mouth. I was not disappointed. I think this jam would make the most delicious glaze on a lemon pound cake.

In my opinion, this is a recipe that you can taste as you go. It is a very acidic mixture so if you decide to leave a little lemon juice out, I don't think you would hurt anything. As always, consult a canning expert to investigate this theory further. Just be sure you have at least 1/2 cup lemon juice in the mixture.


This recipe makes a ton! Please feel free to cut the numbers in half.

Strawberry Lemonade Jam

4 quarts strawberries, cleaned and hulled
5 lemons, zest and juice reserved
1 T lime juice
2 T Balsamic vinegar
12 cups white sugar
1 cup raw sugar
2 packets of powdered pectin

Prepare your canning equipment according to manufacturer's instructions (or the instructions on your pectin packet).

Crush the strawberries using the bottom of a glass in a large (at least 8 quart) pan. Add the lemon zest and juice, lime juice and vinegar and heat. When the mixture begins to bubble, sprinkle the fruit pectin powder over the top. You can add a teaspoon of butter to reduce foaming. Bring to a hard boil that cannot be stirred down. Add the entire volume of sugar and boil hard for 1 minute. Can the jam according to your pectin's instructions.

Yield: 11 12-oz jars

25 June 2009

Family Tradition- Strawberry Shortcake with Bacon

Yep, you heard me right. Strawberry shortcake with a hearty side of bacon. Decadent and delicious... a dinner made of dessert and breakfast gluttony. This is one of my most favorite childhood meals. My gramma made it for me when I would go to stay with my grandparents.


I know it is a childhood favorite of my mom's as well. She said they would have it every summer, as often as her mom could afford strawberries. While this is not exactly a family recipe since I tried a new shortcake recipe, it is a family tradition and family meal. So I am submitting this to my sister, Laura of The Spiced Life, who is hosting this month's family blogging event: Family Recipes: Memories of Family, Food and Fun.
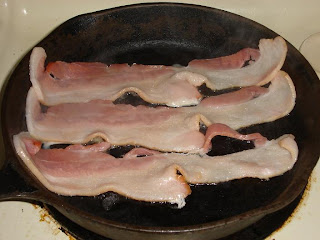
I can understand wanting to eat this meal as often as possible. The saltiness of the bacon is the most delicious counterpoint to the sweetness of the berries and cream. It reminds me of dipping bacon in syrup if that sort of thing appeals to you.


It is a simple dinner to prepare, just whip up your favorite batch of simple shortcake, cook some bacon and enjoy. I don't recommend eating this with a lemon flavored shortcake, I would stick to vanilla.


The shortcake recipe that I tried when I recently shared this meal with my parents was okay. Actually it was really tasty for a buttermilk biscuit. But it was just too biscuit-y to be shortcake for us. We enjoy a shortcake that crumbles, this recipe had buttery, flakey layers instead - just like a biscuit. So while I may not use this recipe for strawberry shortcake again, I would definitely use it to make biscuits to go with a hearty meal.


Strawberry Shortcake
American Home Cooking by Cheryl & Bill Jamison

Berries
5 cups halved strawberries
3 T sugar or more to taste

Shortcakes
2 3/4 cups unbleached, AP flour
2 T sugar
1 1/2 t baking powder
1 t salt
1/4 cup vegetable shortening, well chilled (I subbed in butter here since I don't keep shortening around)
2 T unsalted butter, well chilled
1 cup buttermilk
1 t vanilla extract

Whipped Cream Topping
1 1/2 cups whipped cream, well chilled
2 t pure vanilla extract
2 T sugar, or more to taste

Stir together the strawberries with the sugar, mashing them very lightly with a fork to help release the juice. Let the berries sit at room temperature while you prepare the shortcakes and whipped cream topping.

Preheat the oven to 450 F.

Sift the flour, sugar, baking powder, and salt into a large bowl, preferably a shallow one. Cut the shortening and butter into small chunks, and add them to the dry ingredients. Combine with a pastry blender just until a coarse meal forms. Make a well in the center and pour in the buttermilk and vanilla. With your fingers and a few swift strokes, combine the dough just until it's a sticky mess. Turn out onto a lightly floured board or, better, a pastry cloth. Clean, dry, and flour your hands. Gently pat out the dough and fold it back over itself about a half-dozen times, just until smooth. (A dough scraper helps greatly with this.) Pat out again into a circle or oval about 3/4 inch in thickness. Cover the dough lightly and refrigerate it for about 20 minutes.

Cut the dough with a biscuit cutter, trying to get as many shortcakes as possible, since the dough toughens if it's rerolled. You should be able, with practice, to get about eight 3-inch biscuits, or siz 3 1/2-inch biscuits from the dough. Make your shortcakes with a quick, clean, straight-down push on the cutter. If you twist the cutter, as seems to be a natural motion for many people, it twists the dough, resulting in an uneven shortcake. Bake the shortcakes in the center of the oven, turning the baking sheet around once halfway through the baking time. Bake 3-inch shortcakes for 10-12 minutes total and larger shortcakes for 12-15 minutes, until raised and golden brown.

Prepare the topping, beating together the cream with the vanilla and sugar wtih a whisk or in a chilled mixing bowl with chilled beaters over medium-high speed. Beat the cream only until soft peaks form.

Split a shortcake in half and place the bottom portion in a broad shallow bowl or on a dessert plate. Spoon several tablespoons of fruit and juice over it. Spoon on a dollop of whipped cream. Place the shortcake top over the cream and add another layer of berries and whipped cream. Repeat with the remaining shortakes, berries and cream, and serve immediately.

Serves 6-8

22 June 2009

Father's Day Jam

A couple summers ago, I finally learned how to water-bath can. My mom had her hip replaced, and she couldn't physically do the canning. She normally does various jams, pickles (the BEST! bread and butter pickles of all time!), tomatoes and whatever else tickles her fancy. We were running low on those bread and butter pickles, so my dad basically said that my mom could be the brains and I could do the labor. So my mom sat in the kitchen and ordered me around (nicely, of course). Honestly, it was the best way I could have ever learned to can anything. I was forced to actually do it myself, but I had the expert in the room just in case I had a question. I am so happy I learned this skill. I have fallen in love with canning and creating perfect homemade gifts. Most of my loved ones received home-canned jams, butters, jellies or sauces for Christmas last year. I enjoy challenging myself to make a new jam for my dad for Father's Day or his birthday. My dad has got to be the biggest fan of fruit spreads on the planet, so it is fun to try new creations out on him.


This year is no different. I decided to use up a variety of berries I had on hand to create a RandomBerry Father's Day Jam. No, there is no such thing as a randomberry that I know of, it is just that the combination of fruits in this jam is a little random. However, I am quite sure that the mix is tartly sweet and uses some of the most beautiful fruit available at the markets right now.


**Disclaimer: I did not test the acidity of this recipe, and I accept no responsibility if it does not gel in your kitchen or makes anyone sick. If you have any doubts, just use the recipe for freezer jam or make a small batch to put in your fridge and eat immediately.**


Father's Day 2009 - RandomBerry Jam

12 oz cranberries, fresh or frozen
3.5 cups blueberries, separated
2 cups service berries
6 lemons, zest and juice reserved
1 large orange, zest and fruit segments reserved
1 pouch liquid pectin
6 cups sugar


Sanitize and prepare 7 half-pint glass jars and rings. Soak lids in hot water. Fill your water bath canner halfway with water and begin to heat on stove.


In a large pan, heat the cranberries, 2 cups of blueberries, serviceberries, zest and juice of the lemons, orange zest and the segments from the orange. Heat until the cranberries are all popped and the mixture thickens. Allow mixture to cool slightly and put through the small plate of a food mill (you can skip this step if you want chunkier jam). Have the food mill over a large pan to collect the fruit pulp. In a separate bowl crush the remaining 1.5 cups of blueberries with a potato masher or the bottom of a glass. Once you have milled the fruit, put the pulp back over the heat and add the entire volume of sugar and the crushed blueberries. Bring to a hard boil that cannot be stirred down. Allow the mixture to boil hard for at least a minute, then add 1 pouch of liquid pectin (I used Knorr/Ball brand) and boil hard for 1 minute. Turn off the heat and skim any foam (mine was foam-less). Follow the directions on your pectin to finish water-bath canning the jam, or just put in the fridge and enjoy.

Yield- about 4 pints.

20 June 2009

Serviceberry Buckle

There is no cute title for this post. It needs nothing to suck you in. This snack cake is so delicious that words cannot do it justice. My roommate asked me to remove it from the kitchen (high praise from a fitness professional). My dad, who has a fever post-operation and is a little out of it, gobbled it up and loved it. I couldn't keep out of it fresh out of the oven. Whether you go to the effort to find serviceberries or just make it with blueberries, try this buckle recipe. You won't be disappointed.


What are serviceberries you ask? Well, I have no idea. I read about them on a blog or two last week, and I was determined to find them at the farmers' markets at first opportunity. I snatched up the last two pints from the only purveyor I found selling them. A grizzly man looked slightly perturbed that I grabbed them before he could get a pint, but I didn't give them up. The berries are also known as Juneberries and Saskatoon around here. The farmer I bought them from told me that the birds usually eat them before a decent harvest can be made by humans. My sister happened to buy some from her market recently and was informed that they are more closely related to stone fruits despite their flavor reminding me of blueberries. There is a tiny, edible seed inside of each berry, but I found it barely noticeable. The fruit is sweet and beautiful; its juices turned the cake a lovely shade of reddish purple.


I nearly followed this recipe from King Arthur Flour to the letter. My only substitutions (listed in red) were due to ingredients I had on hand. It seems to be a fool-proof recipe, and I definitely recommend trying it the next time you have berries on hand and want something like a coffee cake to snack on.


Blue(Service)berry Buckle
The King Artur Flour Baker's Companion

One 9-inch square coffee cake, about 16 servings

Batter
3/4 cup (5.5 oz) sugar
4 T (2 oz) butter
1 large egg
1/2 cup (4 oz) milk (I subbed buttermilk)
2 cups (8.5 oz) unbleached, AP flour
2 t baking powder
1/2 t salt
1/4 t ground cardamom (optional) (I omitted)
1 t vanilla extract (optional)
2 cups (11 oz) blueberries (fresh, or if frozen, unthawed) (I used serviceberries)

Streusel
3/4 cup (5.5 oz) sugar
3/4 cup (3 oz) unbleached AP flour
1 t cinnamon
2-3 t lemon zest, or 1/8 t lemon oil (I subbed lime zest)
1/2 t salt
5 1/3 T (2 3/8 oz) soft butter

Grease and flour a 9-inch round pan and preheat the oven to 375 F.

Batter: Cream together the sugar and butter, then add the egg and mix at medium speed for 1 minute. Whisk together the dry ingredients. Stir in the milk alternately with the dry ingredients and vanilla, scraping down the sides of the bowl. Gently fold in the berries. Spread the batter in the prepared pan.

Streusel: In a medium-sized bowl, whisk together the sugar, flour, cinnamon, lemon and salt. Add the butter, mixing to make medium-sized crumbs. Sprinkle the streusel evenly over the batter.

Bake the buckle for 45-50 minutes, or until a cake tester inserted into the center comes out clean. Remove from the oven, and cook it (in the pan) on a rack. Serve the buckle with coffee in the morning, or with whipped cream for dessert.

16 June 2009

Delicious Crunchy Slaw? Cabbage Salad?

As I have mentioned before, I love cabbage toppings for tacos. I call it coleslaw, but I really don't mean for anything creamy or mayonaise-y to come to mind. I think crisp and crunchy, sour and salty, spicy and tart. For me, it is the perfect foil to the richness of just about any taco meat and sour cream. I have also recently enjoyed it as the base for an out-of-this-world taco salad. Instead of bothering with a tortilla, I just layered taco toppings on my plate. It was the perfect excuse to eat a little more of the good stuff and not waste any calories on the tortilla.


This particular slaw combination was inspired by a slaw I had at one of my favorite local restaurants, The Northstar Cafe. They serve their entrees with a seasonal side salad, and at one location this winter, it frequently was a slaw salad made with shredded green cabbage, chopped peanuts, cilantro and some type of lime juice dressing. It was so tasty! I have been on a cabbage kick lately, and remembered that salad and decided to create something similar for a taco dinner I was planning. I ended up maintaining the simplicity with just a few ingredients, but I omitted the peanuts (the peanuts edged the slaw towards SE Asian, and I wanted a more TexMex flavor) and added a lot of hot peppers. I was thrilled with the results. Give it a try as a side for a Mexican flavored meal or throw in some peanuts for more of a SE Asian meal.


Josie's Crunchy Cabbage Slaw Salad

1/2 medium head of green cabbage, shredded
2 poblano peppers, cut into 2" strips
3-5 serrano peppers (or to taste), diced
1 cup chopped cilantro
approximately 1/3 cup fresh lime juice
1-2 T olive oil
pinch of ground coriander
salt and pepper to taste

Combine all the ingredients in a non-reactive bowl and let sit for about 20-30 minutes before serving. It is delicious left over, but some of the crunchiness is lost in the cabbage.

10 June 2009

A Big Change...

Well... a big change to me... I got tile floor in my kitchen! It all started with a soft spot on my linoleum floor near the entrance to my deck. I would stand on the soft spot and think to myself "this can't be good".
before- the hole was right in front of the sliding glass door


Eventually I asked my dad about it, and he agreed that we should look into getting the soft spot fixed since it was most likely the result of water damage. Like many things, it got put on the back burner when I lost my job.

close up of my ugly linoleum

Fast forward to about 4 weeks ago when I was bringing my dogs in through the deck sliding glass door that I mentioned. Light on her toes, Millie ran right on in to the kitchen. However, Crash ambled through and stepped right through the kitchen floor. His hind leg went through the sub-flooring, straight into the basement ceiling. Whoops. Thankfully, Crash hardly even noticed anything happened, and he wasn't injured at all. Of course, I was left with a Great Dane leg sized hole in my kitchen floor. I was no longer able to put fixing the floor on the back burner.

pre-dog beds... not so comfortable for the dogs

I was promptly sent to pick out (cheap) tile from the hardware store, and last week we got started on fixing the kitchen floor. A good family friend repaired the floor and laid the tile while I was at my sister's house enjoying the amazing South Indian feast she prepared for me... you MUST try the potatoes!!! (It was the most wonderful visit, I even stayed an extra night! Laura and her girls are great fun, and I treasure our relationship. I probably don't mention it enough, but I am incredibly blessed to have the best siblings on the planet.)

Millie loves laying on the cool floor, watching the squirrels

Crash prefers the dog bed

I came home to the most beautiful kitchen floor. Crash and Millie are getting used to having a cool, rock hard surface to sleep on - and they got brand new dog beds because of the hard surface.

Crash can be bothered to look out the window occasionally

I am excited to have my kitchen back and better than ever!

Millie is also happy to be allowed back in the kitchen

07 June 2009

Farmers' Market Pasta

Are you like me and totally tempted by just about every vegetable that you come across at the farmers' markets you visit? Do vegetables of every shape and color find their way into your bags without a real recipe or purpose in mind? If so, you must be like me. I am a complete sucker for anything fresh, unusual and vegetable. Of course this early in the growing season, there isn't a huge variety of produce available at the markets, but there are several items that only make a brief appearance. I have already mentioned my undying affection for asparagus, but there are other goodies to be found - like garlic scapes (in fact I described cooked garlic scapes to niece as reminding me of garlicky green beans, and she kept asking me when she could taste the ice skates. I was so confused until I realized she was talking about garlic scapes!) and the first baby kale of the season. Of course there are green onions popping up everywhere and lots of tasty chive blossoms... all vegetables that say spring to me.


After a recent market trip, I came home with much of the aforementioned springtime bounty. I was contemplating the various ways I could use them when I remembered a recent post I saw by Lisa the Waitress at Restaurant Widow. Her post was a simple market lunch with tempting, golden egg yolks that left an impression on me. When I was younger, I loved fried eggs with soft, runny yolks where I would liberally dunk my toast. But as an adult, I couldn't quite get past the thought of the uncooked egg yolks and the potential for an accidental bite of blobby, raw egg white. Thankfully in the past year, I have reacquired my taste for runny yolks. I am no longer afraid of the incidental undercooked egg white (although I do avoid that connundrum by cooking my eggs properly). In fact I have such a love for runny yolks at the moment that even poached eggs tempt me, which never did in my childhood.


Which leads me to my next digression... did you take home economics at any point in your schooling? It was a required class for me in middle school, and I can honestly say I learned a few important life lessons. I can re-attach a button to just about anything - and do it correctly, and I can poach an egg like an eggspert. I used to come home and practice on my dad by making him French toast (another recipe I learned in home ec) with poached eggs. He loved it, and I LOVED cooking it for him. I didn't eat French toast or poached eggs at the time, so I got all of my enjoyment out of making something my dad liked to eat. I am sure this is one of the many experiences that led me to enjoying cooking more for others than for myself.


Anyway, back to the market produce and golden egg yolks. I decided to make a quick miso based pasta dish full of bright green vegetables and topped with two perfectly poached eggs. It was heaven on a plate. I loved that lunch so much that I ate nearly the exact same lunch the following day. I could eat it again right now. It was that good. Instead of listing amounts, I will just let you know what I threw together and you can hopefully be inspired to create something similar.


- sesame oil
- green onions, sliced into 1-2" pieces
- sweet yellow onion, sliced
- serrano chiles, roughly chopped
- asparagus, sliced into 1-2" pieces
- garlic scapes, sliced into 1-2" pieces
- baby kale, roughly chopped
- cilantro, roughly chopped
- angel hair pasta, freshly cooked, cooking water reserved
- super fresh eggs, poached in the reserved pasta cooking water

Mix together the following and set aside:
- 1/4 cup marsala wine
- 1 tablespoon white miso
- 1 tablespoon brown sugar

The veggies (all except kale and cilantro) get browned in the skillet with the sesame oil over medium-high heat. Add the kale, then the miso mixture and cook for another minute or two until kale is wilted. Then add cooked pasta with a little bit of the cooking water if the pan looks dry. Top with a poached egg or two and enjoy.

04 June 2009

Strawberry Cupcake Bug

I caught the strawberry cupcake bug. Several of my favorite blogs recently posted tempting strawberry cupcake recipes. Shelby over at The Life and Loves of Grumpy's Honeybunch did a riff on a recent Cooking Light recipe. Lori of RecipeGirl fame also baked up a version of the cupcakes with the prettiest frosting. All of these lovely pink cupcakes were rattling around in my head, making me want to jump on the cupcake bandwagon. Then my dear friend Allison suggested we head to a local strawberry farm last week and pick a couple baskets for eating. We ended up at Jacquemin Farms which was less than 15 minutes from my house and had rows of beautiful red berries for us to pick. In less than 20 minutes we had picked over 8 quarts - enough for us to eat for the week. And definitely enough for me to finally act on those strawberry cupcakes.


Fate conspired to give me even more reasons to make strawberry cupcakes. I had plans to see some old work friends for a lunch, and I wanted to surprise one of them for their birthday. I succeeded! He didn't think that I would remember that he is turning 50 in the next week, but I remembered by bringing him strawberry cupcakes! Later that same day, I was headed to my sister's house for a few days of fun. I figured my nieces would love the chance to eat a delicious, naturally pink cupcake.


I am really happy I caught the strawberry cupcake bug! I have never eaten a strawberry cupcake, and I cannot say why they sounded particularly good to me this spring. But I think that this will become a springtime baking staple for me - so easy to make and mildly flavored with fresh strawberries and vanilla. I turned to Martha Stewart for the recipe that I used - and I nearly followed it to the letter. In fact, I only deviated from the recipe while making the frosting since I wanted a cream cheese flavor in mine. The recipe is actually from Candace Nelson of Sprinkles Cupcakes. I think I saw Sprinkles Bakery's appearance on the Martha Stewart show when it originally aired, but it didn't really tempt me then. Times change. These cupcakes are delightfully moist (I even ate the last one three days after baking, and the cake was still delicious!), very mildly flavored and easy to put together. The hardest part is making the strawberry puree but a food processor makes that a zip. When I make them again, I think I might try adding some dried strawberries to the batter because I would like the extra strawberry punch that might add (others have mentioned strawberry extract, but I think the dried berries might enhance the strawberry flavor similarly). Definitely give in to your strawberry cupcake craving and try these tasty cupcakes.


Sprinkles' Strawberry Cupcakes
by Candace Nelson

Ingredients
Makes 1 dozen.
  • 2/3 cup whole fresh or frozen strawberries, thawed
  • 1 1/2 cups all-purpose flour, sifted
  • 1 teaspoon baking powder
  • 1/4 teaspoon coarse salt
  • 1/4 cup whole milk, room temperature
  • 1 teaspoon pure vanilla extract
  • 1/2 cup (1 stick) unsalted butter, room temperature
  • 1 cup sugar
  • 1 large egg, room temperature
  • 2 large egg whites, room temperature
Directions

  1. Preheat oven to 350 degrees. Line a 12-cup muffin tin with cupcake liners; set aside.
  2. Place strawberries in a small food processor; process until pureed. You should have about 1/3 cup of puree, add a few more strawberries if necessary or save any extra puree for frosting; set aside.
  3. In a medium bowl, whisk together flour, baking powder, and salt; set aside. In a small bowl, mix together milk, vanilla, and strawberry puree; set aside.
  4. In the bowl of an electric mixer fitted with the paddle attachment, cream butter on medium-high speed, until light and fluffy. Gradually add sugar and continue to beat until well combined and fluffy. Reduce the mixer speed to medium and slowly add egg and egg whites until just blended.
  5. With the mixer on low, slowly add half the flour mixture; mix until just blended. Add the milk mixture; mix until just blended. Slowly add remaining flour mixture, scraping down sides of the bowl with a spatula, as necessary, until just blended.
  6. Divide batter evenly among prepared muffin cups. Transfer muffin tin to oven and bake until tops are just dry to the touch, 22 to 25 minutes. Transfer muffin tin to a wire rack and let cupcakes cool completely in tin before icing.
Head to Martha Stewart for the Sprinkles' Strawberry Icing recipe.