27 April 2009

Sweet and Spicy BBQ Chicken

Awhile back, I promised you my recipe for some delicious bbq sauce/marinade that I have used successfully on chicken. This sauce was basically the product of another refrigerator clean out. I have had several cans of Goya Fruit Nectar in the back of my refrigerator for at least 2 years. I am sure they are well past their use-by-date, but I am not the kind to give up easily. It is fruit juice that has never been opened, and I was planning to cook with it - might as well keep it around until you find a use for it, ya know? I am truly happy that I kept it around and noticed it a couple weeks ago when I was trying to come up with a new chicken marinade. I grabbed a can of the Pineapple-Passionfruit flavor, and that was the backbone of this recipe.


Of course what would a spicy, sweet marinade be without some citrus? I opted for lime which was what I had around, but lemon or even orange would work nicely in this recipe. I also had some left over chipotles in adobo sauce in the far back corner of my-little-shelf-where-things-go-to-die. (Why is it that the narrowest shelf in your refrigerator always becomes the shelf where the most things are forgotten? Or is it just me??) Finally I noticed an open jar of some pepper jelly (jam? It has chunks of peppers) that I canned last summer. I decided these flavors would all work nicely together and create a spicy sweet combination of flavors that would tingle my tastebuds - I was so right!

The first time I used this combination, I marinated raw, boneless, skinless chicken breasts in the sauce overnight before roasting the breasts. While the chicken was in the oven, I reduced the reserved marinade by boiling it for 10-15 minutes. It turned into a slightly thick, incredibly rich, sweet and very spicy barbeque sauce. I basted the chicken during the last 10 minutes of cooking with the reduced sauce. It was absolutely delicious atop some citrusy coleslaw with a brown rice salad.

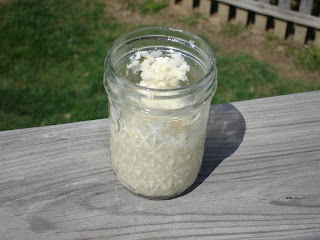
I brought J extra sauce for dipping at the hotel,
which is what you see in the lid.


I had about a cup of "barbeque sauce" left over from that experiment, and I decided to tuck it away in the refrigerator to use for another time (of course it went on that-shelf-where-things-go-to-die!). Thankfully I remembered that I had saved this sauce, and I used it to marinate and baste some roasted chicken that I made for J when we went to Cleveland. J really liked the bbq sauce, but it might have been a little spicy for him. I recommend serving something like sweet potato salad alongside this chicken if you need a little starchy sweetness to cut the spicy. You can also reduce the amount of chipotles that you add to the sauce if you are nervous about heat.


Josie's Sweet and Spicy Barbeque Sauce

juice & zest of 1 lime (or other citrus fruit)
2 cloves of garlic, minced
1/4 cup low-sodium soy sauce
2-3 tablespoons HOT Pepper Jelly
12 oz Pineapple/Passion Goya Fruit Nectar
2-3 tablespoons chopped chipotles in adobo sauce

Combine all ingredients and use as a marinade, or reduce over medium heat to desired thickness to create a barbeque sauce.

21 April 2009

Horsin' Around

Earlier this April I was very fortunate to be invited to my first Passover Seder. I am not Jewish and haven't been exposed to many Jewish religious customs, so I was excited to have the opportunity to go - any religious event that involves food automatically interests me. The hosts were Mary and Mark, the aunt and uncle of my good friend, Allison. I asked if there was anything I could bring despite my utter lack of knowledge of what may or may not be appropriate. Allison decided it would be a fun project to make homemade prepared horseradish since her uncle is such a huge fan of it. Unfortunately time ran out before she could get it done, so I ended up taking over the project. It ended up totally worth the effort and the anxiety over inhaling too many horseradish root fumes.


The Passover meal was a tremendous experience! The food was exceptionally tasty, and the atmosphere was even better. Allison, Mary and Mark were lovely hosts who made me feel right at home - I even got involved in a family horseradish eating contest. I am pretty sure I won. We had brisket with potatoes and carrots, green beans with bell peppers, matzoh ball soup, and all the regular components of a Seder meal - horseradish, parsley, egg, Charoset, and matzoh. I loved getting taste so many new-to-me flavors and share in this family's celebration and thanksgiving. If you are ever lucky enough to be invited to a family's Seder, I definitely recommend taking them up on the offer. I hope to make a regular appearance at Passover - and I will bring the horseradish.

I know what you're thinking...
get your mind out of the gutter.


So back to the horseradish... I consulted several cookbooks (not very helpful) and the internet (more helpful) before deciding to just tackle the horseradish root with enough information to be dangerous. I definitely got the impression from every source that grating horseradish root can be a toxic experience.


As you grate the root, enzymes are released which activate the spiciness we associate with horseradish. Fumes are released by the horseradish which can irritate your eyes and breathing, and supposedly the juices can irritate your skin. I say supposedly because after reading all the information I could find on horseradish, I was so scared of it that I wore gloves and grated it outside. I experienced no ill effects from the horseradish and will probably take similar precautions in the future - although I won't be as afraid next time.


After you peel the root and grate it, you allow the horseradish to sit and mingle, so more of the enzymes can be released and activate the heat. I kept tasting the horseradish as I grated, and it was surprisingly sweet. The root in its raw, not-yet-spicy state reminds me of jicama and radish combined. I read several different opinions on how long to let the grated horseradish sit, but according to most sources, the longer it sits, the spicier the end product. The first batch I let sit for about 10 minutes, and then I added a splash of white vinegar to stop the enzymatic process and prevent oxidization (it will turn gray if you leave it sitting too long). A sprinkle of salt was mixed in to taste, and the horseradish was prepared! The second batch sat for at least 22 minutes, but it started to turn gray, so I decided to add the vinegar. All of the horseradish was tasty, but it wasn't too spicy for my tastebuds. I did some additional research and learned that the greener the root, the less spicy it will be (so a root that is sprouting leaves won't be as hot as a root that has none). Next time I will spend some time examining the roots and be sure to buy one without any new growth. Overall, it was a totally worthwhile experiment, and I look forward to perfecting my method.

19 April 2009

Welcome to the World, Luke (with Banana Bread!)

My sister in law recently gave birth to my first nephew, Luke. He is my little brother's second baby, and he is perfect. It is fairly peculiar to think that my baby brother now has two children of his own, but he is a loving father and a total natural. I was lucky to go up North and visit my brother and his family this past week. I was supposed to be there cooking and helping my sister in law, but I managed to not really cook at all. Instead, I spent the majority of my time playing with my toddler niece who gobbles up the extra attention right now. Of course, I also took the time to cuddle and love the new baby.


Even though I managed to not cook much while I was staying at their house, I did not arrive empty handed. I showed up bearing banana bread, but not just any banana bread - the best banana bread I have ever eaten. It was the second loaf I baked in 2 weeks because it was that good. As in I specifically went to the grocery store and bought bananas to let them get brown to make it again! As in the most decadent, moist, cake-like "bread" I have ever eaten ... and really if you call it bread, you can eat it and not feel as guilty, right?

I discovered this bread while browsing for a recipe that would utilize some browning bananas and old sour cream. I have now used both low fat sour cream and fat free Greek yogurt to make this recipe, and the bread turned out deliciously each time. The bread is thick and rich and really does feel like dessert. I normally love to slather banana bread with cream cheese, but I actually preferred this one unadorned. It takes a couple minutes to throw together, and my house smelled homey and cozy while it baked. My niece, sister in law and little brother all loved the bread as much as I did.


Sour Cream Banana Bread
By Adela Jung at Chow.com

INGREDIENTS
  • 2 cups all-purpose flour, plus extra for dusting
  • 2 teaspoons baking powder
  • 1 1/4 teaspoons kosher salt
  • 1/2 teaspoon baking soda
  • 1/2 teaspoon cinnamon
  • 1 cup granulated sugar
  • 2 large eggs, at room temperature
  • 1/3 cup vegetable oil
  • 1 teaspoon vanilla extract
  • 4 very ripe medium bananas, mashed (about 1 1/4 cups)
  • 1/2 cup sour cream
INSTRUCTIONS
  1. Heat the oven to 350°F and arrange a rack in the middle. Coat a 9-by-5-inch loaf pan with butter and dust it with flour, tapping out the excess. Whisk together 2 cups flour, baking powder, salt, baking soda and cinnamon in a large bowl to aerate and break up any lumps. Set aside.
  2. Combine sugar, eggs, oil, and vanilla in the bowl of a stand mixer fitted with a paddle attachment and beat on medium speed until thoroughly combined, about 2 minutes. Add bananas and sour cream and mix until just combined. Scrape down the sides of the bowl, add flour mixture, and mix until just combined.
  3. Turn batter into the prepared loaf pan and bake until a toothpick inserted in the center comes out clean, the top is golden brown, and the bread is pulling away from the sides of the pan, about 1 hour.
  4. Transfer to a wire rack to cool for 10 minutes. Slide a knife around the perimeter of the pan, invert to release the bread, and cool completely on the wire rack before serving.

13 April 2009

Don't Forget to Check Out the Round Up!

I just wanted to remind you to head over to my sister's blog, The Spiced Life, to see the Grandma's Recipes Round Up.

Something else that always reminds me of my Gramma?


Dogs. She had a dog named Buffy who looked like a horribly disproportionate love seat, but was the most lovable creature.


My Gramma went with my Mom before she was too ill to several of Crash's veterinary appointments. She would always complain about Crash licking her ears from the backseat, but I know she secretly loved it.


I am sure my Gramma is partially to thank for my love of animals - she definitely raised my mom to love them.


Honestly, who could resist a face like this one?

10 April 2009

Memories

When our Gramma passed away earlier this spring, my sister decided to do a blog event in her honor. I was touched and happy that Laura decided to remember our Gramma this way since we all associated cooking with her. I will be honest though, I have dreaded participating and posting to her event. I don't think I have had an opportunity to process her death and battle with Alzheimer's Disease leading up to her death yet. I am a fairly private person when it comes to emotions, and this is an exceedingly emotional topic for me.
Anyone who has had a loved one with Alzheimer's understands the daily struggle to remember the person pre-illness. One of the few ways I have been able to remember my Gramma pre-illness is to cook food that reminds me of her. I think food is one of the best memory triggers. When freshly homemade applesauce hits my lips, I can picture myself running to my grandparents' house, the way the mudroom smelled, the sound of my Gramma and Mom laughing while they prepared apples for apple sauce. It reminds me of playing under the Weeping Willow tree that was my Gramma's pride and joy in her backyard - it made the best fort. There, of course, are other foods that bring my Gramma back into my mind and I am entirely grateful for the memories that they bring forth. My Mom and I have sat down to plates heaped with Strawberry Shortcake and a generous side of thick cut bacon in honor of Gramma, who loved that meal for dinner. Everytime I eat a pancake or waffle, I know my Gramma lives on in me (and my sister) since I opt for brown sugar instead of syrup.


After all of those examples, I bet you are expecting something sweet for this post. But you are wrong. The dish that most reminds me of my Gramma is her Sour Cream Cabbage. It was a side dish that my mom and her siblings grew up eating. I think my Gramma created it because it was economical and incredibly flavorful. You can serve it with just about anything, but I think it pairs beautifully with pork. I made a trip home from college to watch my Gramma make this recipe and write it down since no one else in our family knew it. I loved spending that time in the kitchen with my Gramma and I am happy I had it. Naturally this would be my submission to my sister's blog event, Grandma's Recipes. Visit her blog to read more about our Gramma and other grandmas.


Sour Cream Cabbage
Jane Weaver

1 head cabbage, shredded
3/4 cup butter
1/3 cup cornstarch
1/3 cup water or apple cider vinegar
1/2 cup apple cider vinegar
16 oz sour cream
salt and pepper, to taste

In a large heavy bottom stew pot, add shredded cabbage and enough water to cover the bottom of the pot by about one inch. Turn burner to high and add butter. Steam cabbage until tender. Combine cornstarch and 1/3 cup water or apple cider vinegar in a jar, shake to make a slurry. Lower burner to medium-high, add the cornstarch slurry and bring to a boil to thicken. Once thickened, add the apple cider vinegar and salt and pepper. Remove the pot from heat and stir in the sour cream. Serve with plenty of salt and pepper on the side for additional seasoning.

09 April 2009

More Delicious Summer Flavor

Apparently I have decided it is time to forget about wintery foods and dive straight ahead into summery treats! This next meal definitely says summer to me - refreshing, spicy pineapple salsa on top of pan seared fish with some rich and zesty Santa Maria Pinquito Beans. In case you have never visited Rancho Gordo's website, I highly recommend a look-see. There is lots of good information for anyone who loves beans, and there is plenty of shopping if you are interested in trying some interesting beans.


Up until the past year or so, I was terrified of dried beans - I have no idea why. Now that I have "mastered" making them from scratch, I am mystefied at my earlier fears. Beans are incredibly forgiving in my experience. You can add whatever ingredients you have around to create a tasty stock, in this case I cooked the beans with garlic and a large handful of dried jalapenos from Penzeys. (Check out Rancho Gordo's instructions on making beans here.) The beans are flavorful and creamy, and they paired beautifully with chopped avocado and lime juice. It was the perfect side dish to the zingy pineapple salsa. I loved how the sweet, acidic tang of pineapple salsa cut through the creamy richness of the beans.


So onto the pineapple salsa - I have made many pineapple salsas in my life. It is a personal favorite when paired with a lean protein. I love it with shrimp, fish, chicken, just about anything. It is very simple to put together - usually a base of pineapple, onions and lime juice with whatever add-in's the recipe requires. I was reminded of my love for pineapple salsa when my mom pointed out this article in our local newspaper, The Columbus Dispatch. I think the recipe from the article is a great starting point, and the only significant change I made was to add a chopped jalapeno for heat - I love my spicy food! I also substituted cod for the tilapia out of personal preference.


This was a super simple summer supper to throw together. I definitely recommend trying the salsa with shrimp or chicken if fish isn't your favorite. It is refreshing and light, and it also pairs very nicely with rice.


Tilapia with Fresh Pineapple Salad

The Columbus Dispatch

Makes 4 servings
1 cup fresh pineapple chunks
1 medium Roma tomato
1/4 cup finely diced sweet onion, such as Vidalia
1 garlic clove
3 tablespoons minced cilantro leaves, loosely packed
1 tablespoon lime juice or to taste
1 tablespoon vegetable oil
1/3 cup all-purpose flour
1/2 teaspoon salt
1/4 teaspoon black pepper
4 tilapia fillets (6 to 8 ounces each) or similar mild whitefish fillets
Cut pineapple chunks into fourths and place in a medium-size mixing bowl. Core tomato but don't peel it. Finely dice tomato, and add to bowl along with diced onion. Mince garlic, and add to pineapple mixture along with cilantro and lime juice. Stir to blend well. (Salad can be made and refrigerated up to 2 hours ahead.)
Heat oil in an extra-deep 12-inch skillet over medium heat. Place flour, salt and pepper in a gallon-size zipper-top bag. Add fish. Shake to lightly coat.
Place fillets in hot oil, increase the heat to medium-high, and saute until fish is lightly browned and cooked through, about 3 to 4 minutes on each side. Remove from skillet.
To serve, spoon a thin bed of pineapple salad in the center of each of four dinner plates, reserving about 1/4 cup for garnish. Place a fish fillet over salad on each plate, and garnish with reserved salad.

08 April 2009

A Twist on Potato Salad

Have you ever heard of making a potato salad with sweet potatoes (yams)? I never had until I came across this delicious, colorful recipe. As I was planning for my weekend trip to Cleveland, I knew I wanted to pack lunch for my boyfriend and me to eat in our hotel room. We specifically stayed in a suite-type hotel that had a refrigerator and microwave in the room so I could "cook" for us. While searching for something new and interesting to make (J. was not thrilled with my idea of ham sandwiches!), I came across this Sweet Potato Salad with Chili Lime Dressing recipe on Epicurious.

It is a sweet and spicy salad that is incredibly refreshing. I can see this making many appearances this summer. I think it is the perfect foil for traditional creamy potato salad which can get a little old by the time August rolls around. I also like that this salad would stand up to warm weather a little better than a creamy/mayonaise based recipe.


The potato salad paired beautifully with broiled barbecue chicken breasts and brown rice with beans and corn. I did have lots of fresh vegetables to serve lest you think I was totally overloading J. with carbs, but they froze in the hotel refrigerator. I have learned my lesson and next time I would double check the temperature! The barbecue chicken was divine, and I will share my recipe with you soon. J. was very happy with our "hotel picnic", and it felt so wonderful to do something nice for him. He has been amazing over the past few weeks with all my ups and downs, and I truly appreciate having him in my life.

Head over to Epicurious for the best selection of recipes - it is probably my favorite internet resource when it comes to cooking.

Sweet Potato Salad with Chili-Lime Dressing

Epicurious | March 1999
Lauren Chattman
Just Add Water

This is a great summer salad, perfect with all kinds of barbecue and grilled foods. It's also a wonderful way to brighten up a winter dinner of broiled chicken or beef.
Yield: Makes 6 servings

Ingredients
2 pounds sweet potatoes, peeled and cut into 1-inch chunks
1/3 cup extra-virgin olive oil
2 tablespoons fresh lime juice
1 teaspoon chili powder (I did a mix of medium chili powder and chipotle chili powder)
1/2 teaspoon ground cumin
1/4 cup finely chopped fresh cilantro leaves
salt and freshly ground black pepper to taste
1/2 medium-size red bell pepper, seeded and cut into 1/4 inch dice (I used yellow bell pepper)
4 scallions, white and light green parts, finely chopped (I subbed in about 3 tablespoons of finely chopped onion)
(I added 1 finely chopped jalapeno for extra heat)

Preparation
Place the sweet potatoes in a large saucepan and cover with water. Bring to a boil and cook until just tender, 7 to 10 minutes (don't overcook or your salad will be mushy and falling apart.) Drain and transfer to a large bowl.
While the potatoes are cooking, make the dressing. Whisk together the olive oil, lime juice, chili powder, cumin, cilantro, salt, and pepper in a small bowl. Add the red bell pepper and scallions to the potatoes and toss with the dressing. Season again with salt and pepper. Serve warm or refrigerate and bring to room temperature before serving.

07 April 2009

Hershey's Strikes Again...

I recently took a weekend trip up to visit one of my closest friends in Cleveland. My boyfriend met me in Cleveland, and it ended up being a wonderful trip. It was full of fun foodie adventures, like visiting the West Side Market and taking a brewery tour of Great Lakes Brewing Company. We also ate at a Michael Symon Restaurant, Lola. It was truly amazing, and I cannot understate the taste-bud-magic that happened when I tasted the Crispy Pig Ear from the appetizer menu. It really is one of the tastiest treats I have ever eaten.

While packing for the trip, I had the brilliant idea to bake some brownies to share with my friends. I didn't want to make an everyday brownie, and I had to work with the items I already had in my pantry. Inspiration struck when I puttered around in my basement and discovered a bag of Reese's Peanut Butter Chips languishing away. I decided to let those chips be my guide and use a recipe I found on the back of the bag for Double Peanut Butter Paisley Brownies. They are more like a blondie or a bar cookie to me, but regardless, they are delicious. My friend and her boyfriend were very happy with their large bag of brownies, and my boyfriend was very sad that I only saved him a small sandwich bag. If you enjoy Reese's Pieces, you will like these brownies!

This picture makes me regret not saving some for me!

I did make a couple small adjustments based on what I had on hand, but I think they would be delicious as written. I do not keep Hershey's Syrup around (despite the occasional craving for it on vanilla ice cream or stirred into milk), so I decided to take a chance and omit it entirely. Of course that sort of ruined the "paisley" effect, but they still tasted great. I did make an executive decision to follow the idea behind adding the chocolate syrup and stirred in about 1 cup of dark chocolate chips. I think the dark chocolate paired very nicely with the sweet peanut butter chips. I would definitely make this recipe again.


Hershey's Double Peanut Butter Paisley Brownies

Ingredients:
  • 1/2 cup (1 stick) butter or margarine, softened (I used butter)
  • 1/4 cup REESE'S Creamy Peanut Butter (I used whatever brand I had on hand)
  • 1 cup granulated sugar
  • 1 cup packed light brown sugar
  • 3 eggs
  • 1 teaspoon vanilla extract
  • 2 cups all-purpose flour
  • 2 teaspoons baking powder
  • 1/4 teaspoon salt
  • 1-2/3 cups (10-oz. pkg.) REESE'S Peanut Butter Chips
  • 1/2 cup HERSHEY'S Syrup (I used dark chocolate chips instead, about 1 cup)
Directions:
1. Heat oven to 350°F. Grease 13x9x2-inch baking pan.

2. Beat butter and peanut butter in large bowl. Add sugar and brown sugar; beat well. Add eggs, one at a time, beating well after each addition. Blend in vanilla.

3. Stir together flour, baking powder and salt; mix into peanut butter mixture, blending well. Stir in peanut butter chips. Spread half of batter into prepared pan; spoon syrup over top. Carefully top with remaining batter; swirl with metal spatula or knife for marbled effect.

4. Bake 35 to 40 minutes or until lightly browned. Cool completely in pan on wire rack. Cut into squares. About 36 brownies.

05 April 2009

Preventing food waste with Ina Garten

Do you have a chest freezer? Is it full of raw ingredients you bought because you had every good intention of actually cooking something with them? Have some of those ingredients been in your freezer for, oh, a year maybe? Did you suddenly lose your job and realize maybe you should investigate some of those frozen mystery foods and actually use them? Welcome to my world.

First of all, I should have prefaced this entire post with my tale of woe - a few months ago I purchased a gallon of apple cider for my uncle who lives in Louisiana. The plan was for me to freeze the quality Ohio cider so my brother could take it down to my uncle on his next visit (apparently you cannot get good apple cider in Louisiana, shocking, I know). So I poured some of the cider out and popped it in my chest freezer. A week or so later, I opened the freezer up to a frozen volcanic eruption of apple cider. There is a part of me that wishes I had been around to personally witness this scientific explosion - I am sure there was a lot of air pressure meets cold air meets potentially fermenting liquid. It is still in my freezer. I am slowly working my way around the frozen explosion of apple cider, and I swear I will clean my freezer soon!


So one of the frozen mystery items that I have encountered are apples. Lots and lots of apples. I found 4 cups of diced and peeled apples that were over a year old! I decided to whip a crisp up and eat them despite their dubious age. I am happy that I did! I tried a new-to-me Ina Garten recipe that was delicious. I had a couple servings and actually sent the remainder of the pan home with my best friend who is a sucker for my desserts. I believe she said it was the perfect breakfast. So what makes this crisp special? The zest in it. Who knew adding some orange and lemon zest to an apple crisp would be so special and amazing!? Why didn't you tell me sooner if you knew?! I will definitely save this recipe and make it in the future to impress J.

Hopefully your stove top is cleaner than mine!


Old Fashioned Apple Crisp
Ina Garten
Copyright 2002, Barefoot Contessa Parties!

Serves: 10 servings

Ingredients:

  • 5 pounds McIntosh or Macoun apples
  • Grated zest of 1 orange
  • Grated zest of 1 lemon
  • 2 tablespoons freshly squeezed orange juice
  • 2 tablespoons freshly squeezed lemon juice
  • 1/2 cup granulated sugar
  • 2 teaspoons ground cinnamon
  • 1 teaspoon ground nutmeg

For the topping:

  • 1 1/2 cups flour
  • 3/4 cup granulated sugar
  • 3/4 cup light brown sugar, packed
  • 1/2 teaspoon kosher salt
  • 1 cup oatmeal
  • 1/2 pound cold unsalted butter, diced

Directions

Preheat the oven to 350 degrees F. Butter a 9 by 14 by 2-inch oval baking dish.
Peel, core, and cut the apples into large wedges. Combine the apples with the zests, juices, sugar, and spices. Pour into the dish.
To make the topping, combine the flour, sugars, salt, oatmeal, and cold butter in the bowl of an electric mixer fitted with the paddle attachment. Mix on low speed until the mixture is crumbly and the butter is the size of peas. Scatter evenly over the apples.
Place the crisp on a sheet pan and bake for 1 hour until the top is brown and the apples are bubbly. Serve warm.

(I halved the recipe, and it worked very well.)