26 March 2009

Another Creamy Soup?!

I have been on a creamy soup roll. I don't even like creamy soup all that much, but for whatever reason, they have been making my mouth happy recently. Maybe it was just a reconnection with my immersion blender, and the fact that is is an incredibly simple, delicious way to use up leftovers or dying produce. This creamy soup was inspired by Tigers and Strawberries, a beautiful Ohio blog by Barbara. She might know more about different Asian cuisines than anyone else I have come across. And she also might know more about the Appalachian hillbilly approach to food than anyone else I have come across (and I mean that in a completely complimentary way - she frequently refers to her hillbilly roots). She frequently refers to her childhood in the Appalachian hills, where food was homegrown and homemade. If I had to guess, I would say this soup is an amalgamation of her childhood experiences and foodie sensibilities. A hearty broccoli, potato and onion base is emulsified using an immersion blender until smooth and creamy, at which point you add in all your fabulous cheese odds and ends. Lastly you toss in some broccoli florets and you are left with some delicious Creamy Broccoli Cheese Soup.

This is right before I added the broccoli florets in,
I didn't take any pictures of the final product... oops.


I especially like visiting Tigers & Strawberries because there are always ideas for using up the leftover bits that we all have languishing in our refrigerator. I am not a leftover person, so I have to find new, creative ways to use up what might otherwise be construed as a leftover. In this soup I was able to use up a variety of sad produce like potatoes that were sending up sprouts, some broccoli that was starting to look a little wan, some carrots that were going a tad soft, and even a stray sweet potato that needed a home. Basically I followed Barbara's suggestion that you could take her recipe and add and subtract to fit your ingredients. I only had 3 small potatoes so I decided to add in the lonely sweet potato to increase the creaminess. I figured a carrot wouldn't hurt anything, so I added it in to the creamed base. My cheeses were found in the back of my meat drawer, some moldier than others. I used a mixture of smoked provolone, cheddar and even a little nub of -gasp- velveeta. I definitely followed Barbara's recommendation of adding your cheeses while your immersion blender is working - I was so impressed at how quickly the cheeses melted. It also made the soup so much creamier than it would have normally been! Definitely check out Tigers & Strawberries for her Broccoli Soup recipe, more brilliant tips and delicious recipes.

21 March 2009

The Best Quick Smoothie Breakfast

I know, I know... I probably shouldn't claim anything to be the best - but really, this is the first smoothie I have whipped up that really satisfies me as a breakfast supplement. Count me as a girl who needs to chew food to be satisfied, so when I tried coming up with a new breakfast smoothie I was definitely skeptical on how much I would like it as a meal replacement.


I specifically like this smoothie because it has more to offer than just sugar. It packs a serious protein punch without using protein powder! You read that right - no protein powder but still full of healthy lean protein! I cannot stand the chalky mouth feel of protein powders, and I am anxious about putting such a highly processed ingredient into my body, especially the ones that are loaded with artificial sweetener (talk about disgusting!).


In the past year, I have truly discovered Greek yogurt. I say truly discovered because I had eaten it before, but I had never really figured out how I enjoyed it until the past year. Greek yogurt is packed with lean protein, lower in carbohydrates and lactose than regular yogurt and a great building block for a healthy diet. I know it can be higher in fat and calories than regular yogurt, so I just look for 0% fat - it is so rich and creamy that I don't notice the missing fat and calories. I have learned to love yogurt by taking plain 0% fat Greek yogurt and mixing it with a teaspoon of homemade blueberry jam and topping with some homemade granola. It is delicious! Since discovering that combination, I always have it around the kitchen. I decided to try it in my skeptical smoothie, and it really worked out!


This smoothie starts with frozen blueberries - a perfect money saving ingredient since frozen is always cheaper than fresh. Then a few cubes of ice, a big dollop of fat free Greek yogurt, some banana and a little juice to loosen everything up. After a few pulses in the blender, it comes together smoothly and nicely. I love this smoothie. I am no longer skeptical - the yogurt makes it ultra filling, and the fruit provides just enough sweetness to make it really tasty.

Skeptical Smoothie (serves 1 large or 2 small)

1 cup 0% Greek yogurt
1/2 cup ice
3/4 - 1 cup frozen blueberries
1 small, ripe banana
1/2 - 3/4 cup juice (I like fresh squeezed orange juice here)

Add all ingredients to a blender (adjust your liquids to create a smooth, easily blend-able consistency) and liquefy until smooth. (I find my blender works best if I put the ice and frozen blueberries on the bottom, then layer the banana and yogurt on top and pour the juice over the whole mess.) Enjoy!

18 March 2009

A Day Late for St. Patty's Day, but Still Delicious


I have mentioned my sister too many times to count at this point, but I think she deserves another shout-out today. Through her blog, I have discovered several new and wonderful food blogs that have made my must-read list. One of those blogs is Big Red Kitchen, where Robin Sue is constantly cooking up something tasty. I was recently perusing her blog when a St. Patrick's Day post caught my attention. The first thing that caught my eye were the costumes - a supper club that includes dress up?! This sounds like my kind of club! But the recipe at the bottom of her post for Irish Soda Bread was the thing that caught my eye and kept it. I knew I had to try out the recipe and see if it tasted as delicious as it looked on Robin Sue's blog.

The recipe was very simple to follow, and most of the ingredients were pantry basics for me. Robin Sue decided to leave out the caraway seeds and substitute dried cherries for the raisins originally called for the in the recipe. I followed her lead and omitted the caraway seeds as well, but I decided to follow the original recipe and use raisins instead of cherries (I have a box of raisins that is withering away and really needs to be used up! Any great raisin recipes out there??).


The only other significant substitution I made was to replace buttermilk with a combo of sour cream and spoiled milk. I am trying hard to use up ingredients I have on hand when possible, and I couldn't justify buying buttermilk for one recipe. I think my substitution worked very well. The spoiled milk and sour cream combo replicated the tangy snap of buttermilk - I highly recommend saving your spoiled milk and using it - especially in quick breads (including pancakes and waffles). It adds a great flavor, and it feels good to use up something that would otherwise get tossed.


The final product does taste as great as I thought it would! My mom has been eating it for breakfast (it makes a large loaf so I shared with various family members). It was divine straight out of the oven, slathered in butter. I think the eggwash glaze really tops this bread off, so don't skip that step!


Head over to Big Red Kitchen and check out Robin Sue's post for Irish Soda Bread for the recipe. I hope you enjoy her blog as much as I do!

15 March 2009

Comforting Creamy Soup

As I previously mentioned, I have had a chaotic few weeks recently. In the midst of all that chaos, while I was preparing for my sinus surgery, I wanted comfort food. Specifically I wanted fattening, rich, buttery potato soup. However, I didn't have any bacon on hand - and I really think that potato soup needs a healthy dose of bacon. So I decided to improvise and make a creamy soup equally comforting, but a little easier on the waistline. I definitely believe I succeeded in my goal and plan to make this soup again and again.


I started the soup like I do most - with a healthy glug of olive oil and a large onion, chopped. Next I added in the classic flavor boosts - celery and carrots. While the vegetables were softening in the oil, I started peeling several potatoes, both sweet and Yukon gold. I decided to toss the sweet potato in at the last minute. It would give the soup a nutritional boost and also add a sweet little tinge of flavor and color to the finished product. I also wanted some heat, so I added some dried jalapenos to the mix (I think the dried jalapenos sold by Penzeys are some of the most useful ingredients to have on hand if you love spicy foods). Finally, I added some frozen chopped bell peppers I have around from last summer. Some homemade chicken stock from the freezer loosened everything up. I let the vegetables simmer away on the stove top until the potatoes were soft, then I used my handy dandy immersion blender to whiz the whole pot up into a silky smooth soup. I topped it with a little shredded cheese to emphasize the creaminess. The soup was delicious and filling, and I ate all of the leftovers which is a real rarity for me.

Blended Vegetable Soup

1 T olive oil
1 medium onion, chopped
2-3 stalks celery, chopped
2 carrots, chopped
1 cup chopped bell peppers
3 small-medium Yukon Gold potatoes, peeled and diced
1 large sweet potato, peeled and diced
1/4 cup (or to taste) dried jalapeno peppers (can sub fresh to taste)
enough chicken stock to cover vegetables
salt and pepper, to taste
shredded cheese for garnish

In a medium sauce pot over medium heat, add the onions and oil. Allow onions to soften for about 5 minutes, then add celery and carrots. Cook until vegetables begin to soften and add the diced potatoes, bell peppers and dried jalapenos. Cover the mixture with chicken stock and let simmer on the stove until potatoes are tender, about 20 minutes. Use an immersion blender to process until a smooth consistency is reached and serve, topped with shredded cheese.

07 March 2009

While I am Recovering...

I had surgery on Thursday to repair a deviated septum and clean out my sinuses. While I am healing (and not cooking), please check out my sister's upcoming blog event, which is obviously near and dear to my heart.

03 March 2009

Tasty Layered Mexican Dip

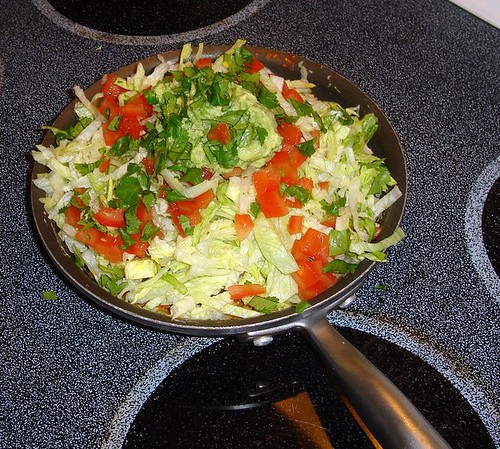
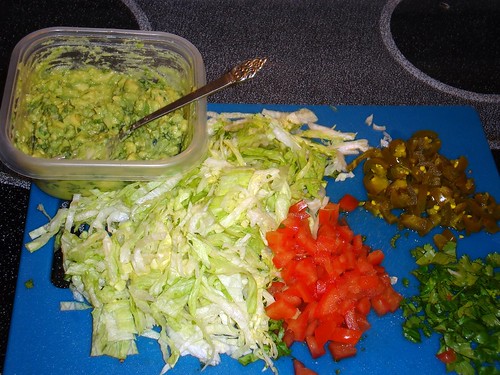
One of my most favorite comfort foods is Mexican Refried Beans. I love the creamy texture of mashed beans, oozing with the essence of onions, garlic and cumin. I don't have any authority on the authenticity of the way I make my beans, but they taste good - and that is good enough for me. Recently I have enjoyed using the beans as a base for a layered "dip" which I try to eat more like a salad (if you add enough shredded lettuce, it counts as a salad, right??) with just a few tortilla chips for garnish.


I think the most important base to refried beans is lard. And when I say lard, I am not referring to that pearly white stuff you find in the large chain grocery stores. I am referring to the toasty, slightly caramel colored stuff you get from a butcher or local farmer. It has not been refined, and it is packed with rich porky flavor. I always start with a nice dollop of lard in the bottom of my skillet, to which I add plenty of chopped onions and garlic. I like letting the aromatics cook down and get slightly browned in the lard. Then you know it is time to add the rest of your ingredients. Any bean works in this dish, but I prefer some type of black bean or pinto bean. You can add spices that sound good to you, or try some of my suggestions below. I would let your tastebuds guide you - really the only requirements to outstanding refried beans, if you ask me, are lard, onions, garlic and beans!

Delicious Layered Mexican Dip

Refried Beans (recipe below)
Grated Cheese
Salsa (homemade or purchased)
Shredded Lettuce
Chopped Tomatoes
Chopped Cilantro
Chopped Pickled Jalapenos
Guacamole

Layer the refried beans, cheese and salsa in an oven-proof skillet. Bake at 400 degrees until the cheese is bubbley. Layer remaining ingredients on top of the salsa and serve with tortilla chips.


Refried Beans

1-2 T good lard
1 medium chopped onion
1 T minced garlic
1/4 c chopped jalapenos
1-2 t cumin (or cumin seeds, crushed)
1-2 t freshly crushed coriander
15 oz can black/pinto beans, drained and rinsed
1 c frozen corn (optional, but highly recommend)
salt and pepper, to taste

In a medium skillet over medium heat, melt the lard and add the onions and garlic. Sautee until onions begin to brown slightly. Add the spices and beans and cook for about 3-5 minutes. Use a potato masher to thoroughly squash the mixture into desired consistency. I like it fairly smooth, so I mash for awhile. Turn the heat down and stir the frozen corn into the mashed beans. At this point you made need to add a little water or chicken stock to thin the beans out if you want a looser texture. You can serve as-is as a delicious side dish or use in any dish that calls for refried beans.

02 March 2009

Wow. What a Week...

A lot has happened since I decided to get back to blogging. It all started with a lay off. My employer basically shut down my department at work - at least it wasn't personal, right? Then we got word that my grandma, who was suffering with Alzheimer's Disease, would be gone soon and died. Then I got strep throat. Now I am left worrying that I will be unable to have a previously scheduled sinus surgery this Thursday due to strep throat. Ugh. Someone give me some good karma please!

Anyhoodle. If anything good came out of the past two weeks, it was lasagna. Or at least that is what my sister says. She sent me a very cute email asking me to blog about the lasagna that I made for my grandma's funeral. Apparently her husband and children adored it so much that she wants to be able to make it for them. I know she liked it, but I don't think she adored it - she isn't much for red sauce Italian food. So here is my problem - I threw this lasagna together without a recipe while chatting with a 2nd step cousin twice removed about my recently departed grandma. It is entirely possible I have no idea what I did to make this lasagna. But because I love my sister, and I am 78% sure I gave her strep throat, I am going to do my best to tell you all what I did to make my lasagna (or at least what I would do if I was trying to recreate it ;)).

Sorry for the lack of pictures... they were the last thing on my mind!

Lasagna by Josie - I don't swear to any of this recipe so email me if I am unclear!

2 packages no boil lasagna noodles
32 oz favorite marinara sauce (I used Classico)
32 oz favorite canned tomatoes (I used Mom's)
~8 oz shredded provolone cheese
~8 oz shredded mozzerella cheese
16 oz ricotta cheese
~8 oz shredded pecorino romano cheese
1 lb ground pork
1 lb ground beef
1 large onion, chopped and divided into equal halfs
6 garlic cloves, minced and divided into equal halfs
3 eggs
1 package frozen spinach, thawed and all moisture squeezed out
olive oil
basalmic vinegar
fennel seeds
dried basil
salt
pepper

In a large sautee pan over medium-high heat, add 2 tablespoons olive oil and the ground meats (you could omit the oil if you have excessively fatty meat and/or brown the meat then drain the fat and start fresh with some olive oil and the cooked ground meats). Cook until meat begins to brown, stirring often. Add half the onion and garlic to the pan, cook until meat is thoroughly browned and onions are beginning to turn golden. Add about a tablespoon of dried basil and about 1/2 teaspoon crushed fennel seeds, salt and pepper to taste. At this point taste the meat and see if you want more basil or fennel. Season meat with additional spices and stir in about 1 tablespoon of basalmic vinegar. Set meat aside.

In a small sautee pan over medium-high heat, add about 3 tablespoons of olive oil and the remaining onion and garlic. Cook until the onion is transluscent or beginning to turn golden. Set aside to cool. In a large bowl, add the ricotta cheese, shredded mozzerella and half the pecorino romano. Mix thoroughly, then add the eggs and drained spinach. After the onion/garlic mixture has cooled for about 5 minutes, add it to the bowl and mix thoroughly. At this point add about 1-2 teaspoons of dried basil, salt and pepper.

To assemble the lasagna, drizzle the bottom of a large, deep sided roasting/lasagna pan with olive oil. Then add about 1/2 cup of the marinara sauce. Spread the sauce so the entire bottom of the pan is coated. Add the first layer of uncooked lasagna noodles. Spread with 1/2 of the cooked meat mixture. Add about 1/2 of the shredded provolone cheese. Spread about 1/2 of the remaining marinara over the meat. Add another layer of lasagna noodles. Spread with 2/3 of the cheese mixture. Add the next layer of lasagna noodles. Spread with the remaining meat mixture combined with the remaining cheese mixture (I might have done two separate layers here if I had a deeper pan- one cheese and one meat instead of the combination). Add the remaining marinara sauce. Add the last layer of lasagna noodles. Spread the canned tomatoes and their juices over the entire lasagna. Then sprinkle the top with the remaining provolone and pecorino romano cheese.

Bake at about 350 for 1 hour covered, remove cover/foil and bake for an additional 30-45 minutes until brown and bubbley. These times will need to be compensated for if your lasagna is cold (I made it in advance and had it waiting in the refrigerator for post-funeral dinner - it probably took more like 2.5 hours to cook through, but it makes a huge lasagna!).